Is your computer a victim of deep learning fatigue? Common symptoms include;
- Your trusty workhorse taking 45 minutes to run a ‘lightweight’ Tensorflow model
- The bottom of your MacBook continuously threatening to set your pants on fire
- Or your CPU fan sounding like it’s trying to cool the sun
Fear not, you are not alone. Thousands of data scientists and deep learning pros struggle with the same pains every day. But…you shouldn’t have to put up with it! It’s time you took your deep learning into your own hands, or more specifically in the case of this post, put it into the hands of AWS.
This post has been a long time coming. I’ve been running basic models on my local MacBook for a 2 and half months now and this week I figured it was probably time to step it up and get serious.
Hence…the deep learning environment.
AKA an AWS EC2 instance that has a beefy GPU for neural network training.
Ready to get your own? Start clicking and typing along below….
1. Get an AWS account
The fastest way to set up a deep learning environment is to use Amazon Web Services Elastic Compute Cloud. Ignore the jargon, it basically allows to you can run a server from the cloud.
Head over to AWS and sign up for an AWS account.
1.1 [Windows Users] – Install a Bash Command Line Interface
If you happen to be using a Windows PC then it’ll make your life a whole lot easier if you install a Bash CLI. Doing so will allow you to run bash commands used later on. There are two options you can choose from CYGWIN or GOW. CYGWIN is a fully fledged version which will give you access to pretty much any and every bash command there is whereas GOW is a little lighter on. Do the right thing…install CYGWIN.
2. Install AWS CLI
Once you’ve got a Bash client installed the next step is to install the AWS Command Line Interface. Trust me this will make your life a whole lot easier as you’ll be able to start, stop and create instances (read: servers) on the fly without using the AWS console (read: using the web interface).
In order to install the CLI, open up your terminal or existing CLI and run the command
pip install AWSCLI
3. Setup a User
The next step is to create a User so you can access the server. Sign into AWS console using the account credentials you created in Step 1.

From the home screen, use the search bar to search for IAM. This service allows you to create and manage users and their access. Select the first search result that pops up.

Select Users

Select Add user

Enter a username. Tick Programmatic access towards the bottom of the page. Select Next: Permissions.

Select Attach existing policies directory and tick AdministratorAccess.

Your user screen should now look like this. Select Create user.
 And you’re done. Before clicking close, copy down the Access Key ID and Secret access key and keep it somewhere safe. You’ll need these details when you configure the AWS CLI in the next step.

4. Configure AWS
Okay, you made it through creating a user. You’re halfway there. Now that you’ve got an Amazon account, installed a bash CLI and created a user you’ll need to start ‘connecting’ your local computer to the server. The first step is to configure AWS from your command line. From your command line type:
aws configure

You’ll be prompted for four different inputs. Your access key, security key, default region name and default output format.
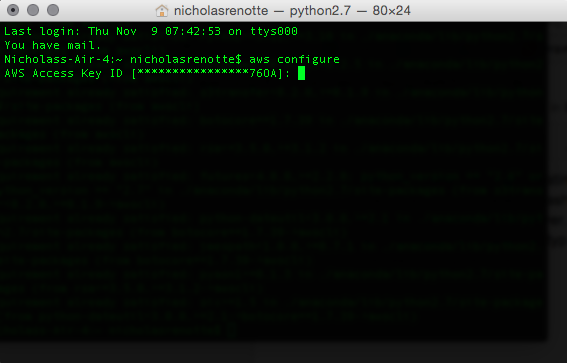
Access Key: Enter the Access key ID from Step 3.
Secret Access Key: Enter the Secret access key from Step 3.
Default Region Name: us-west-2
Default Output Format: text
And that’s it, AWS is configured.
5. Download and run the setup scripts
In order to speed up the install we’re going to be using the same setup scripts from Jeremy Howard’s fast.ai course. He’s prebuilt an Amazon Machine Image (AMI) which contains everything you need to get started with deep learning. TL;DR; this step allows us to skip installing applications and dependencies and get to the fun bit a whole lot faster.
Run the following two commands to download the necessary setup scripts.
curl -o setup_p2.sh https://raw.githubusercontent.com/fastai/courses/master/setup/setup_p2.sh
curl -o setup_instance.sh https://raw.githubusercontent.com/fastai/courses/master/setup/setup_instance.sh
After each command a progress bar will appear to show the status of each download.
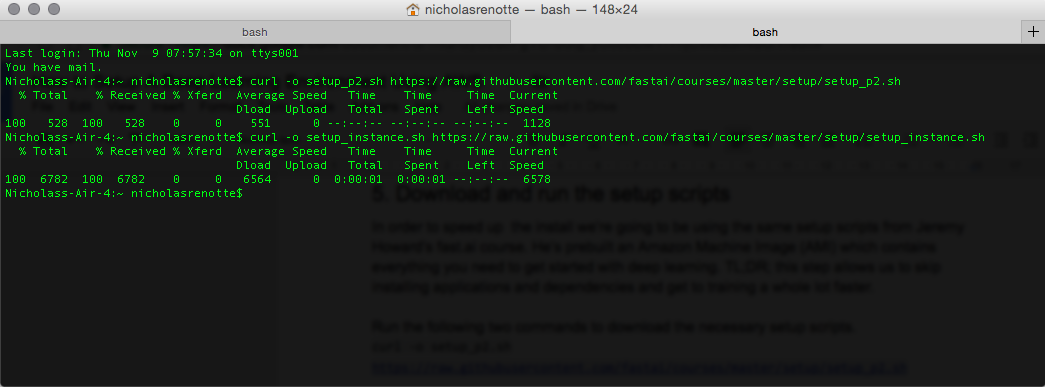
IMPORTANT NOTE: The next step will start paid servers on Amazon that start at $USD0.90 to run per hour (depending on your location). There are cheaper servers that will allow you to practice deep learning but it’ll take absolutely forever to train and test your model if you want to using a reasonably sized data set.
Run the following command to set up and start your instance.
bash setup_p2.sh
If you’re just playing around then it’s possible to launch an environment that’s scaled back (and doesn’t cost as much). In this case download the following file.
curl -o setup_t2.sh https://raw.githubusercontent.com/fastai/courses/master/setup/setup_t2.sh
and run
<pre>bash setup_t2.sh</pre>
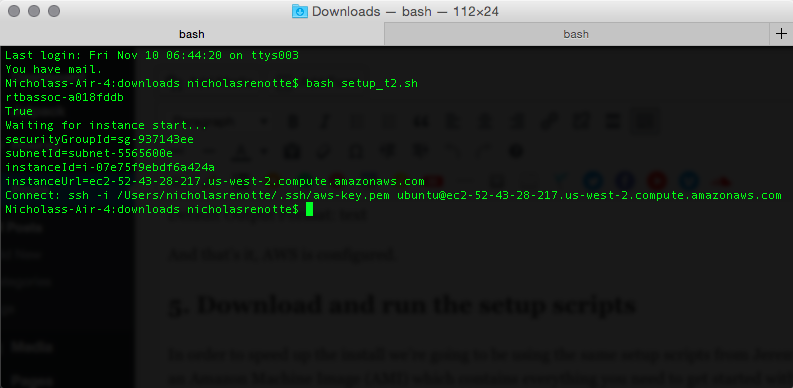
Copy down the text that comes after Connect: and save these for later. This SSH command will be used to log into the server in the next step.
6. Connect to the environment using SSH
You’re now ready to connect to your server using Secure Shell aka SSH. This will allow you to use the GPU on the server whilst still working from your local desktop.
To start your SSH session run the following using the Connect (SSH) command you copied at the end of Step 5. Remember to replace the fields with your user details where appropriate. It should look something like this.
ssh -i /path/my-key-pair.pem ubuntu@ec2-198-51-100-1.compute-1.amazonaws.com
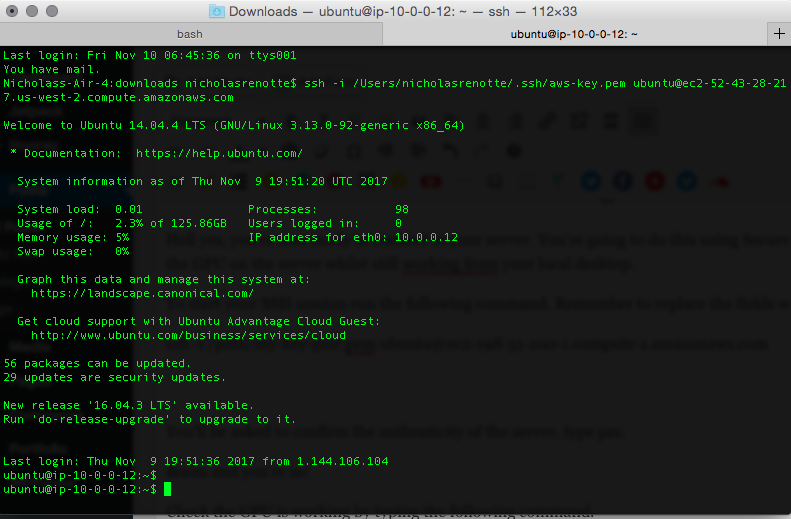
You’ll be asked to confirm the authenticity of the server, type yes. Boom. You’re in!
If you’ve used the setup_p2 script you’ll have GPU resources available. You can check the GPU is working by typing the following command.
nvidia-smi
Next run this command to remove a legacy file.
Sudo rm .bash_history
7. Start Jupyter Notebook
Now that you’re in and connected you should be able to start Jupyter Notebooks and commence training. In order to do that, run
jupyter notebook
at the command line and hit enter. This will start the Jupyter service in the deep learning environment.

Go to a browser and go to the following URL: <your EC2 public DNS>:<Jupyter Port Number>.
Your EC2 public DNS is the same one that was used to SSH into the server. So using the example above where our SSH command was ssh -i /path/my-key-pair.pem ubuntu@ec2-198-51-100-1.compute-1.amazonaws.com.
The public DNS would be ec2-198-51-100-1.compute-1.amazonaws.com.
The Jupyter port number will be displayed on your terminal.
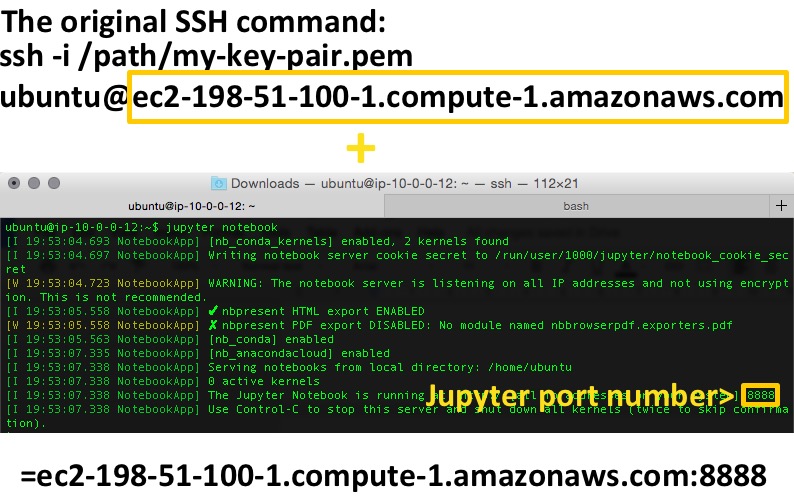
Your URL should look like the last line above. Throw it into Chrome and you’ll be directed to a Jupyter login page. To login use the default password: dl_course.

You’re in and running. The environment has Theano and Keras preloaded so you can build, train and test your models as soon as you’re in. Open up a new notebook to get up and running.

Import theano and keras and away you go!

Once you’re done, you can terminate your instance by logging into the console stopping the instance or if you’re more comfortable with the command line by using the stop-instances command. There you have it, your very own deep learning environment!


